One of the key features of a well-optimized website is the ability to resize images efficiently. Resizing images not only improves page loading speed but also enhances the overall user experience. If your website is powered by WordPress, here’s a simple tutorial on how to resize images effortlessly.
Step 1: Log in to Your WordPress Dashboard
Access the backend of your website by logging in to the WordPress dashboard.
Step 2: Navigate to Media Library
Go to the “Media” section in the left-hand menu. This will take you to the Media Library where all your uploaded images are stored.
Step 3: Select the Image to Resize
Locate the image you want to resize within the Media Library. Click on the image to open its details.
Step 4: Click on Edit Image
Once the image is open, look for the “Edit Image” option. Click on it to access the image editing screen.
Step 5: Resize the Image
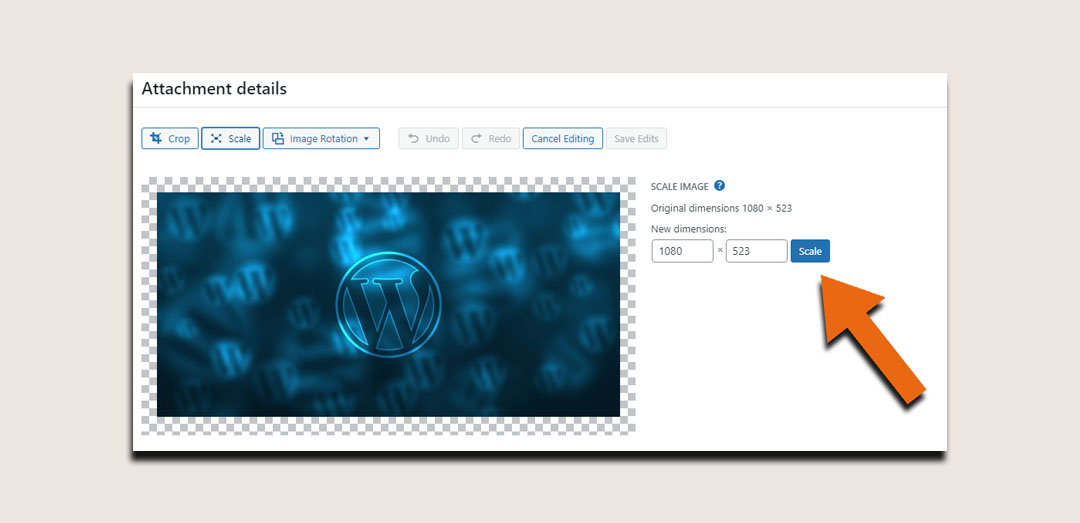
In the image editing screen, find the “Scale Image” or “Resize” option. Enter the new dimensions for your image. You can resize it to a different aspect ratio, but be cautious as this may crop parts of the image.
Step 6: Warning – Avoid Upscaling
While resizing, remember never to upscale images (increase their dimensions) as it leads to quality loss. Upscaling cannot add detail that wasn’t there in the original, and it may result in pixelation.
Step 7: Save Changes
After adjusting the dimensions, click on the “Save” or “Update” button to apply the changes to your image.
Step 8: Check the Resized Image
Return to the Media Library to confirm that your image has been successfully resized. You can also visit the corresponding page or post on your website to view the resized image in action.
By following these simple steps and keeping the warning in mind, you’ve empowered your website to efficiently handle image sizes, contributing to a faster and more user-friendly online experience. Remember to always keep a backup of your original images before making any edits. Happy resizing!


